To configure your IP phone, you will need a computer (to access the web based configuration).
Once your IP phone has been connected to your internet router (or network switch)...
- Find the IP address of the Yealink phone by pressing the menu icon
 on the screen and then select the menu option Status.
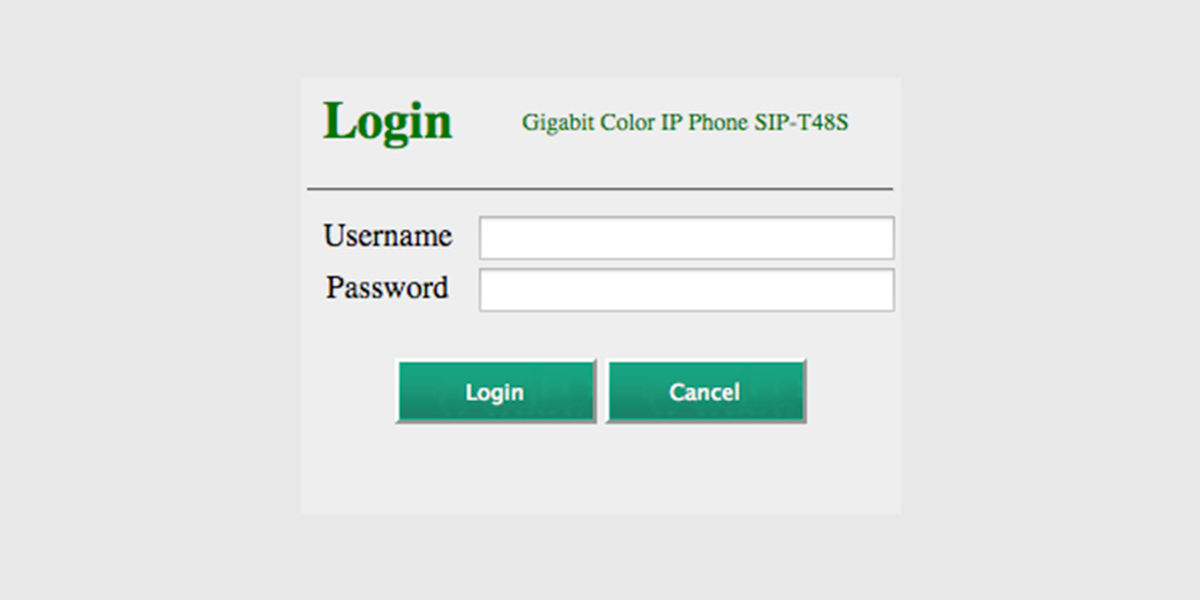
- Enter the IP address found in Step 1, listed next to IPv4, as a URL using a web browser on your PC.
The URL would look like: https://192.168.0.22
- You will be prompted for a username and password.
You will require administrator access to your Yealink phone, in order to configure the service details.
The access details are:- Username: admin
- Password: admin
You should see the status screen online once you login.
- From the top menu, select ACCOUNT.

- In the Register section (left menu), select Account1 from the droplist then ensure Line Active is selected on Enabled.
On this page, apply the below settings as detailed:
#1 (Label): VoIPMuch
#2 (Display name): VoIPMuch
*This does not affect CallerID
#3 (Register name) Enter your VoIP Much SIP Device Username
(as provided in your activation email and in the Device Settings page of the User Portal)
#4 (User name) Enter your VoIP Much SIP Device Username
(as provided in your activation email and in the Device Settings page of the User Portal)
#5 (Password) Enter your VoIP Much SIP Device Password
(as provided in your activation email and in the Device Settings page of the User Portal)
#6 (Server host) Enter your VoIP Much SIP Server
(as provided in your activation email and in the Device Settings page of the User Portal)
#7 (Nat) Select Enabled.
Once all settings are entered, click Confirm to save your entries.

- Congratulations, your done!
Article ID: 146, Created: 11/23/2021 at 9:25 PM, Modified: 9/4/2022 at 9:18 AM